No-Bake Peppermint Oreo Balls – A Festive Recipe Idea
Why I Keep Coming Back to These Peppermint Oreo Balls
You know that one recipe you trot out every single holiday season because it just works—even when life’s gone a bit pear-shaped? That’s these peppermint Oreo balls for me. My cousin Claire first brought them to our family movie night (Die Hard is a Christmas movie, don’t @ me), and we demolished them so fast her tray practically vanished. I’ve been making my own version ever since. The holidays feel a bit off without them now, honestly. Is it weird to call a dessert “cozy”?
Why You’ll Love This (Or, Why My Family Demands Them)
I make these when I’ve run out of energy but still want to offer something impressive (or at least sweetly bribing). My family goes mad for anything with Oreos; these get demolished before they’ve even set half the time. Plus, you don’t need to touch the oven (which is good when mine is usually full of… something else), and the whole process reminds me of sneaking bites of batter as a kid—no raw eggs to stress about now. Oh, and if you mess up the chocolate coating, just call them “rustic.” Learned that the hard way, ha!
Gather These Ingredients (Substitutions Included!)
- 1 (14oz) package Oreo cookies (Use store brand, honestly, nobody can tell in the end. I’ve even tried peppermint Oreos—they work brilliantly.)
- 1 block (8oz, or “a hunk,” as my mum says) cream cheese, softened (If I’m out, I swap in mascarpone, though it’s a bit fancier than needed.)
- 3/4 tsp peppermint extract (Go easy here, or you’ll feel like you’ve licked a candy cane pole; you can also use crushed extra mints if you want it chunkier.)
- 2 cups semisweet chocolate chips or melting wafers (I’ve melted down a leftover Advent calendar chocolate bar before. Tasted fine, a bit… mysterious.)
- Optional: Crushed candy canes or sprinkles for topping (Anything red and sparkly—my niece calls this the “sparkle zone”)

How I Throw These Together (Give Yourself Wiggle Room)
- Smash your Oreos. Chuck the whole package—creme and all—into a food processor. Blitz till they’re fine crumbs. If you fancy a bit of texture, keep a few small lumps. No processor? Stuff them in a big ziplock and bash with a rolling pin (just check the bag for holes first).
- Mix with cream cheese and peppermint. Toss the Oreo rubble in a bowl with your softened cream cheese and peppermint extract. I use clean hands towards the end—spoons get you only so far. This is where I always sneak a taste. Don’t blame me.
- Shape the balls. Roll small spoonfuls into balls—somewhere between the size of a walnut and a golf ball (honestly, just eyeball it). Place on a baking sheet lined with parchment. Don’t worry if they’re wonky; they’ll get covered in chocolate anyway.
- Freeze ’em. Pop the tray in the freezer for maybe 20–30 minutes. If you forget and it’s an hour—no big deal. The colder they are, the easier for dipping.
- Melt your chocolate. Microwave in bursts (30ish seconds at a time), stirring between, until smooth. If it seizes up, just add a dab of coconut oil. Actually, I find it works better if you use a glass bowl. Don’t ask me why.
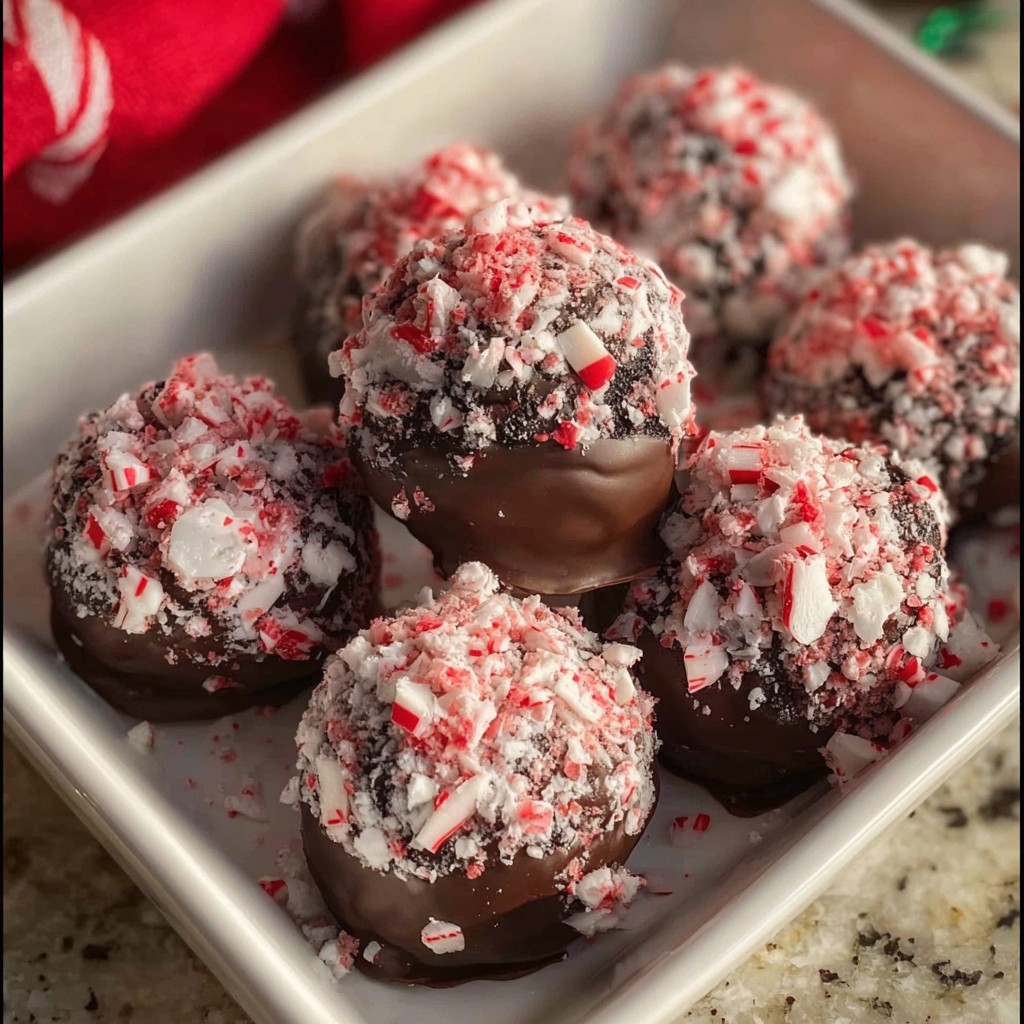
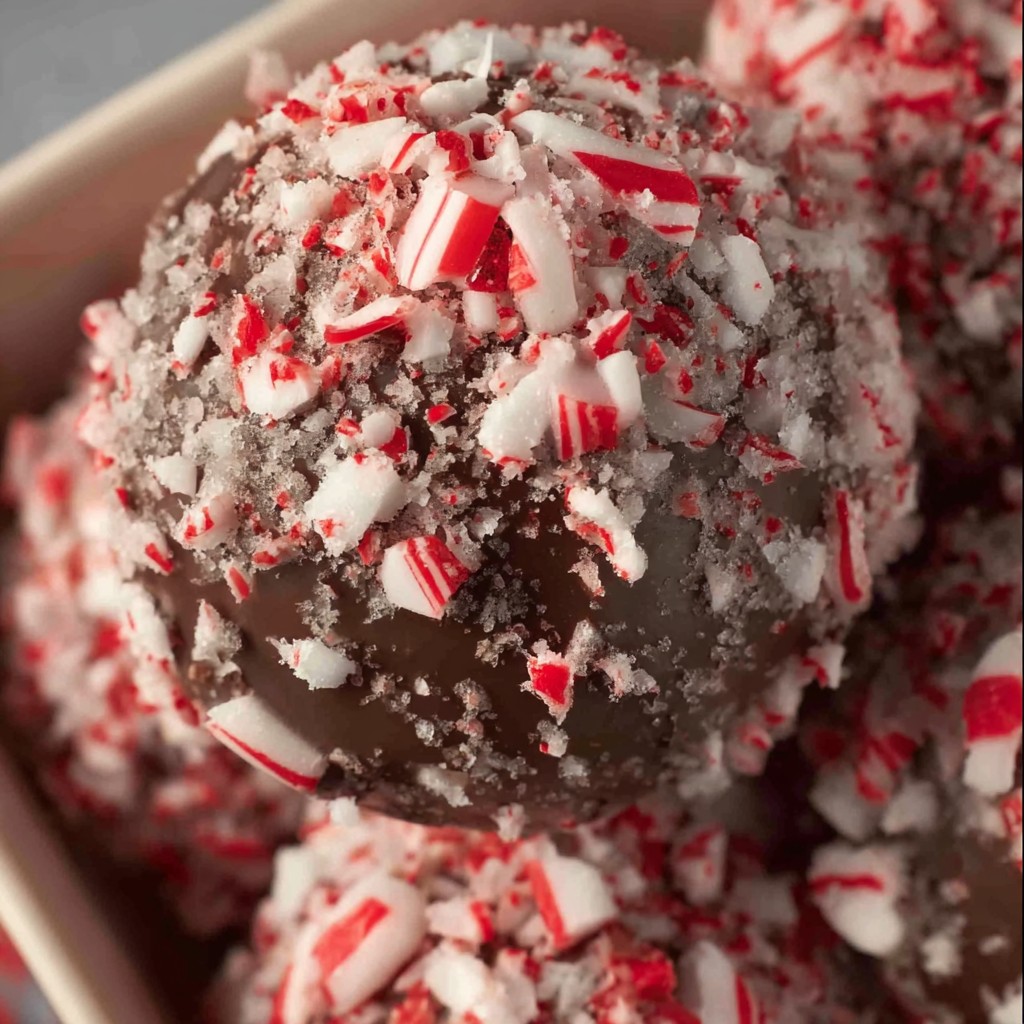
- Dip and decorate. Stick a fork in the balls and dip them in chocolate; shake off excess. Put them back on the sheet and top with crushed candy canes or whatever makes you smile. They might look a little lumpy, but that’s half the charm.
- Chill again. Back into the fridge till the chocolate’s set. Or just eat one warm and messy—I’ve done that more times than I’ll admit.
Little Things I Learned (Usually the Hard Way)
- Don’t skip the freezer step—if you try to dip warm balls, you’ll be cursing sticky hands for ages.
- If you run out of chocolate halfway… um, just roll the rest in cocoa powder. Pretend it’s a truffle, I won’t tell.
- Peppermint extract packs a punch. Start small if you’re unsure. I once doubled it and—wow, nasal decongestant central.
- Leaving the balls in the fridge overnight makes them even better—if you can wait, which I almost never do.

Twists I’ve Attempted (Some More Successful Than Others!)
- Swapped in golden Oreos and lemon extract—nice, if you’re in a spring mood, but honestly not festive.
- Used white chocolate: Good in theory, but mine burned fast. If you nail it, it’s so pretty with crushed raspberry bits.
- Tried adding chopped nuts once. It… didn’t blend well. I wouldn’t recommend!
What You’ll (Probably) Need, But Don’t Stress If You Don’t
- Food processor: Makes crumbs in a flash, but honestly, a sturdy bag and rolling pin (or wine bottle, been there) do the trick.
- Mixing bowl: Big enough, ideally, for squishing with your hands.
- Baking sheet and parchment: Or just any large plate—parchment keeps the mess contained.
- Microwave (or stovetop, if you’re old-school or your microwave’s on the fritz)
How to Keep These (If You Somehow Manage Not to Eat Them All)
Fridge is best (airtight container). They’ll be good for up to a week, in theory, but in my place they vanish by day two tops. You can freeze them too, just let them thaw a bit before eating unless you like jawbreakers for dessert!
Serving Them Up – My Favorite Bits
I plonk a pile of these on a cake stand, then stand back and let the feeding frenzy begin. We’ve even made a tradition of passing the plate with hot cocoa and sticking a candy cane straw in the mug. Oh—sometimes I sneak a couple into my partner’s lunchbox, and the texts I get after? Priceless.
Mishaps and Pro Tips (Learned With Laughter & Regret)
- Don’t rush melting the chocolate—if you try to speed microwave it, it’ll seize and you’ll have to start over. Slow and steady, mate.
- If some balls flatten out in the fridge, just reshape them again. No crime, no one cares. I call those “peppermint patties” and suddenly they’re artisanal.
- Definitely let them set fully before stacking. Once I didn’t, and ended up with The Great Sticky Stack Incident (not my finest hour).
Random FAQ I’ve Actually Gotten (Or Asked Myself)
- Can I make these ahead? Yep! Actually, I think they taste better the next day. Flavors settle, ya know?
- Is there a trick to getting the chocolate coating smooth? Umm… practice, patience, and using a fork for dipping helps, but honestly, rustic is in vogue.
- What if I don’t like peppermint? Just swap in vanilla or orange extract. Or go wild with instant coffee. No one’s checking your homework.
- Do I have to use real Oreos? Honestly, the off-brands hold up fine. Sometimes even better, if you ask me.
- How long do they keep? Officially, a week in the fridge—unofficially, they’re usually gone in 24 hours. (I blame the “midnight snack fairy.”)
- Where do you find fun sprinkles and candy toppers? I get mine here, though even your corner store probably sells something festive. Or check out this rundown on baking toppings if you want to get fancy.
Final wandering thought: You ever notice how every family has that one dessert that gets requested—sometimes even demanded—every year? This has become ours, though easily replaced with a new favorite if someone discovered, say, peanut butter fudge. Until then, I’ll be rolling these little morsels by the dozen, probably with chocolate somewhere on my forehead. Happy (no-)baking!
Ingredients
- 36 Oreo cookies, finely crushed (about 14 oz)
- 8 oz cream cheese, softened
- 1/2 teaspoon peppermint extract
- 12 oz white chocolate chips or melting wafers
- 1/4 cup crushed peppermint candies or candy canes
- 2 oz semi-sweet chocolate for drizzling (optional)
- Pinch of salt (optional)
- Festive sprinkles (optional)
Instructions
-
1Line a baking sheet with parchment paper. Crush Oreo cookies into fine crumbs using a food processor or by placing them in a zip-top bag and crushing with a rolling pin.
-
2In a large bowl, combine the Oreo crumbs, softened cream cheese, and peppermint extract. Mix until fully combined and smooth.
-
3Roll the mixture into 1-inch balls and place them on the prepared baking sheet. Freeze the balls for 15 minutes to firm them up.
-
4Melt the white chocolate chips or melting wafers according to package instructions. Dip each Oreo ball into the melted chocolate, coating completely, and return to the baking sheet.
-
5Immediately sprinkle the tops with crushed peppermint candies before the coating sets. Drizzle with melted semi-sweet chocolate or add festive sprinkles if desired.
-
6Refrigerate until the chocolate is set, about 10 minutes. Store in an airtight container in the refrigerator until ready to serve.
Approximate Information for One Serving
Nutrition Disclaimers
Number of total servings shown is approximate. Actual number of servings will depend on your preferred portion sizes.
Nutritional values shown are general guidelines and reflect information for 1 serving using the ingredients listed, not including any optional ingredients. Actual macros may vary slightly depending on specific brands and types of ingredients used.
To determine the weight of one serving, prepare the recipe as instructed. Weigh the finished recipe, then divide the weight of the finished recipe (not including the weight of the container the food is in) by the desired number of servings. Result will be the weight of one serving.
Did you make this recipe?
Please consider Pinning it!!