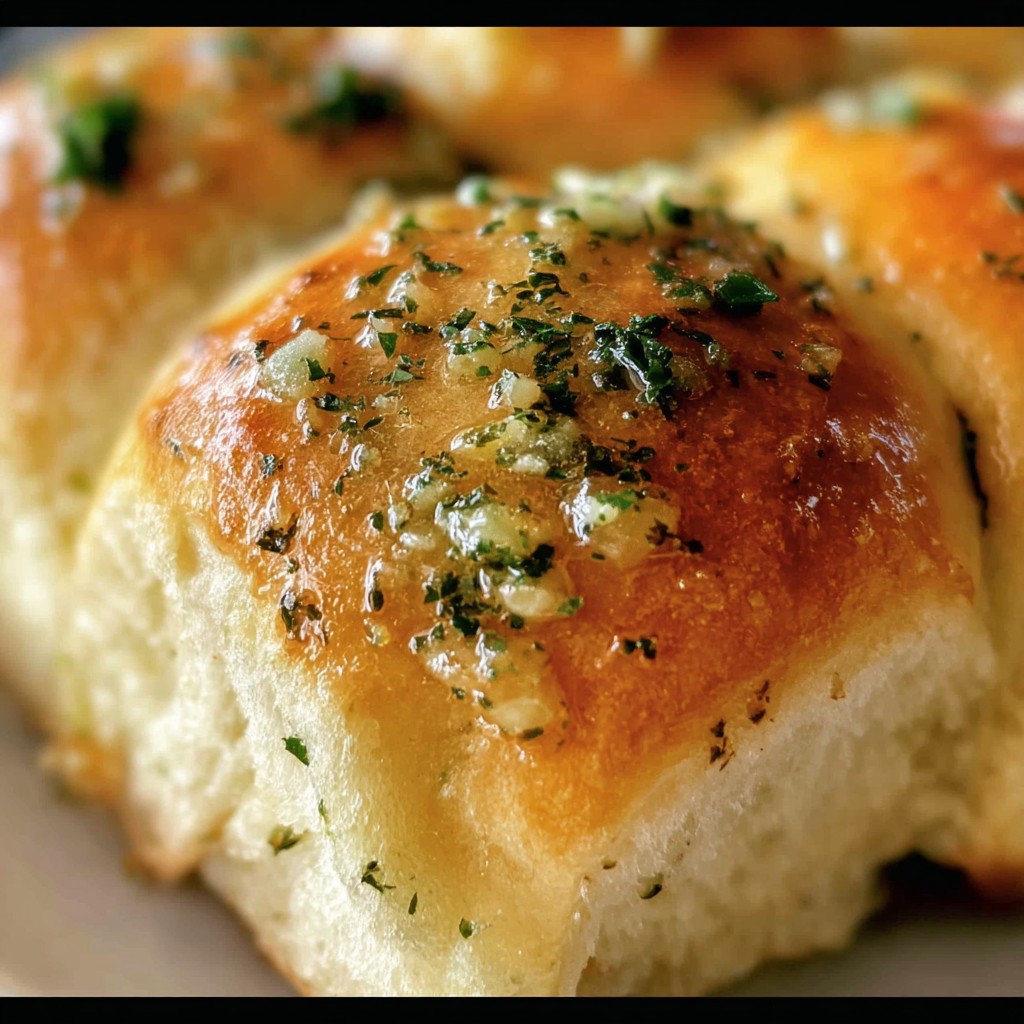
The Best Garlic Butter Dinner Rolls
If we’re being honest, nothing quite says “comfort food night” at my place like the smell of fresh garlic butter dinner rolls baking up all golden and puffy. Back when I was still learning how not to set off the smoke alarm every time I turned on the oven (which, let’s be real, is still an occasional hazard around here), I stumbled onto this recipe. The first time, the dough stuck to my hands like glue; the second, I forgot the salt (don’t recommend it). But once I hit my stride, my family started asking, “When are you making those rolls again?” every week. There’s just something about pulling apart a warm, pillowy roll, steam curling up, that makes you forget your day—unless you burned your thumb because you were impatient, in which case, run it under cold water and proceed.
Why I Make These Rolls All the Time
I make this recipe anytime I want dinner to feel like a proper occasion, even if it’s just a Tuesday and we’re eating leftovers. My kids absolutely lose their minds; I think they’d eat these for dessert if I let them. I even caught my husband swiping the last one straight form the tray once (he tried to look innocent but the garlic butter on his chin gave him away). Also, making these is actually relaxing for me—once I figured out not to overthink the dough texture. There’s a bit where you’ll want to panic because the dough feels too soft, but just trust the process. Or, worst case, brush off the flour and call it rustic.
What You’ll Need (and Substitutions I Actually Use)
- 3 cups all-purpose flour (though I sometimes swap in 1 cup of bread flour if I’m feeling wild—makes ‘em extra chewy!)
- 2 tablespoons sugar (if you’re more of a savory person, go down to 1 tablespoon)
- 1 packet (2 1/4 teaspoons) instant yeast—my gran swore by Red Star but honestly, store brand works
- 1 cup warm milk (a little warmer than baby bathwater—not too hot! Water works if you’re out of milk)
- 4 tablespoons unsalted butter, melted (I once swapped in olive oil and… would not recommend, but hey, live and learn)
- 1 large egg, room temperature (when I forget to take it out, I just stick it in a mug of warm water for 5 mins)
- 1 teaspoon salt
- 5 cloves garlic, finely minced (or, in a pinch, garlic powder, but fresh is miles better)
- A small handful of chopped parsley (totally optional, but it does make you look fancy)
How I Make These Rolls (Some Steps Are Optional… Just Don’t Skip Kneading!)
- In a big bowl, whisk together the warm milk, sugar, and yeast. Wait a few minutes so it foams a little—honestly, sometimes I skip waiting and it still works fine.
- Stir in the melted butter and egg. It might look like a weird science experiment at this point. That’s normal.
- Chuck in 2 cups of flour and the salt. Mix; you’ll get a sticky mess—this is where I usually question my life choices. Gradually, work in the last cup of flour until you can grab the dough with lightly-floured hands.
- Knead on a floured surface about 8 minutes, until really smooth. Or just toss it in a stand mixer with a dough hook, set a timer, and go read this guide on yeast while it does the work.
- Pop the dough in a greased bowl and cover with a towel—let it rise about an hour, until doubled. Sometimes my kitchen’s cold and it takes longer, so go with the flow.
- Punch the dough down (fun bit!), divide into 12 lumps, and shape into balls. Put ‘em in a buttered baking dish, kinda snug but not packed in way too tight.
- Cover, rise about 30 minutes. Preheat oven to 350°F (175°C) while you clean up the inevitable flour explosion.
- Bake for 20-25 minutes, until tops are golden and puffy—don’t over-bake unless you like them dry (I learned the hard way).
- Meanwhile, melt remaining butter and stir in garlic and parsley. Brush this garlicky goodness all over the warm rolls right out of the oven. This is where I have to shoo my daughter away from peeling one straight off the pan.
Stuff I’ve Learned the Hard Way (Notes)
- If you’re worried it’s too sticky, it’ll probably be perfect after rising; adding extra flour makes them a bit dense but still edible.
- Fresh garlic is best, but if the only thing in the cupboard is powder, just use that. Honestly, no one’s been disappointed.
- You can use oat milk if you’re out of regular, just don’t tell my uncle, he’s a real dairy purist (bless him).
- Browning too fast? Cover with a bit of tinfoil. Forgot and burnt the tops once—still ate them, just with extra butter.

Variations I’ve Attempted (Plus One Flop)
- Rosemary instead of parsley is quite posh, honestly.
- I once stuck cubes of mozzarella inside each roll—major hit with the kids, but the cheese oozed a bit so line your tray if you try this.
- Attempted a sweet version with cinnamon and sugar (don’t do it with the garlic base, trust me, that was… weirdly haunting).
- Want dinner rolls without dairy? Coconut oil sort of works, but they’re different—not worse, just… different.
Equipment I Actually Use (& Improvise With)
- Big bowl (or two if you’re lazy about washing up after rising)
- Baking dish or tray—mine is ancient Pyrex, but any 9×13-inch pan works
- Optional: stand mixer with dough hook. But don’t panic, you can knead by hand (I do when I need to work off some steam).
- Basting brush for the garlic butter—confession, I once just drizzled with a spoon and nobody complained

Storage (Not That They Last That Long)
Technically, you can put these in an airtight container and keep at room temp for a day or two. I guess you could freeze them too, though honestly, in my house they never last more than a day! (If you’re better at rationing food—teach me your ways?)
How I Like to Serve These
Honestly, I think these rolls are good with just about anything, but most often, we serve them with a big pot of soup or chili. My son likes using them as makeshift burger buns (kid’s got imagination). At family gatherings, I set out a little bowl of extra garlic butter—let folks DIY their level of indulgence. Sometimes, if we’re feeling feisty, I’ll set out hot honey for drizzling, which is… surprisingly awesome.
A Few Pro Tips I Learned the Hard Way
- Don’t rush letting the dough rise, no matter how hungry you are. I once tried to speed things up in a warm oven and ended up with flat, weirdly tough rolls—never again.
- Melted butter cools fast: brush that garlic mix on quick or it solidifies (procrastination is not your friend here).
- Bake nearer the center of the oven, especially if yours runs hot—trust me, burnt bottoms are the worst.
- If you’re worried about yeast, check King Arthur Baking’s yeast tips—they’ve saved me more than once.
Real Questions I’ve Gotten (FAQ)
- Can I double this recipe? Yep, I’ve done it for potlucks. Use two pans or a jumbo tray and just eyeball the rise times a bit.
- My rolls are super dense—what did I do? Happens! Usually means too much flour or not enough rise time. It took me a few tries to get the texture just right, so don’t sweat it.
- Can I use active dry yeast instead of instant? You can; just let it sit in the warm milk and sugar until bubbly before adding the rest.
- I don’t have fresh garlic—will powder work? Yep, totally. Start with half a teaspoon, taste the butter, add more if you’re feeling spicy.
- How do I reheat leftover rolls? Cover with foil, warm in a 300°F oven for 5-7 minutes. Or, microwave for 10 seconds (they’ll go a bit chewy, but sometimes convenience wins out).
- Can I make the dough ahead? For sure—once it’s shaped, stick it in the fridge overnight, let it warm up & rise before baking. Actually, I find it works better if you do this; texture is magic!
So, there you have it—the best garlic butter dinner rolls I know, straight from my often-chaotic kitchen. Hope yours turn out as addictive as ours. And if you end up with sticky dough on every surface? Join the club. That’s half the fun.
Ingredients
- 3 1/2 cups all-purpose flour
- 2 1/4 teaspoons active dry yeast
- 1 cup warm milk (about 110°F)
- 1/4 cup granulated sugar
- 1/4 cup unsalted butter, softened
- 1 teaspoon salt
- 2 large eggs
- 4 tablespoons unsalted butter, melted (for brushing)
- 3 cloves garlic, minced
- 1 tablespoon fresh parsley, chopped
Instructions
-
1In a large bowl, combine warm milk, sugar, and yeast. Stir and let sit for 5 minutes until foamy.
-
2Add softened butter, eggs, and salt to the yeast mixture. Gradually add flour, mixing until a soft dough forms.
-
3Knead the dough on a floured surface for about 7 minutes until smooth and elastic. Place in a greased bowl, cover, and let rise in a warm place for 1 hour or until doubled in size.
-
4Punch down the dough and divide into 12 equal pieces. Shape into balls and place in a greased 9×13-inch baking dish. Cover and let rise for 20 minutes.
-
5Preheat oven to 375°F (190°C). Bake the rolls for 20-25 minutes, or until golden brown.
-
6While the rolls bake, mix melted butter, minced garlic, and parsley. Brush the garlic butter over the warm rolls immediately after baking. Serve warm.
Approximate Information for One Serving
Nutrition Disclaimers
Number of total servings shown is approximate. Actual number of servings will depend on your preferred portion sizes.
Nutritional values shown are general guidelines and reflect information for 1 serving using the ingredients listed, not including any optional ingredients. Actual macros may vary slightly depending on specific brands and types of ingredients used.
To determine the weight of one serving, prepare the recipe as instructed. Weigh the finished recipe, then divide the weight of the finished recipe (not including the weight of the container the food is in) by the desired number of servings. Result will be the weight of one serving.
Did you make this recipe?
Please consider Pinning it!!