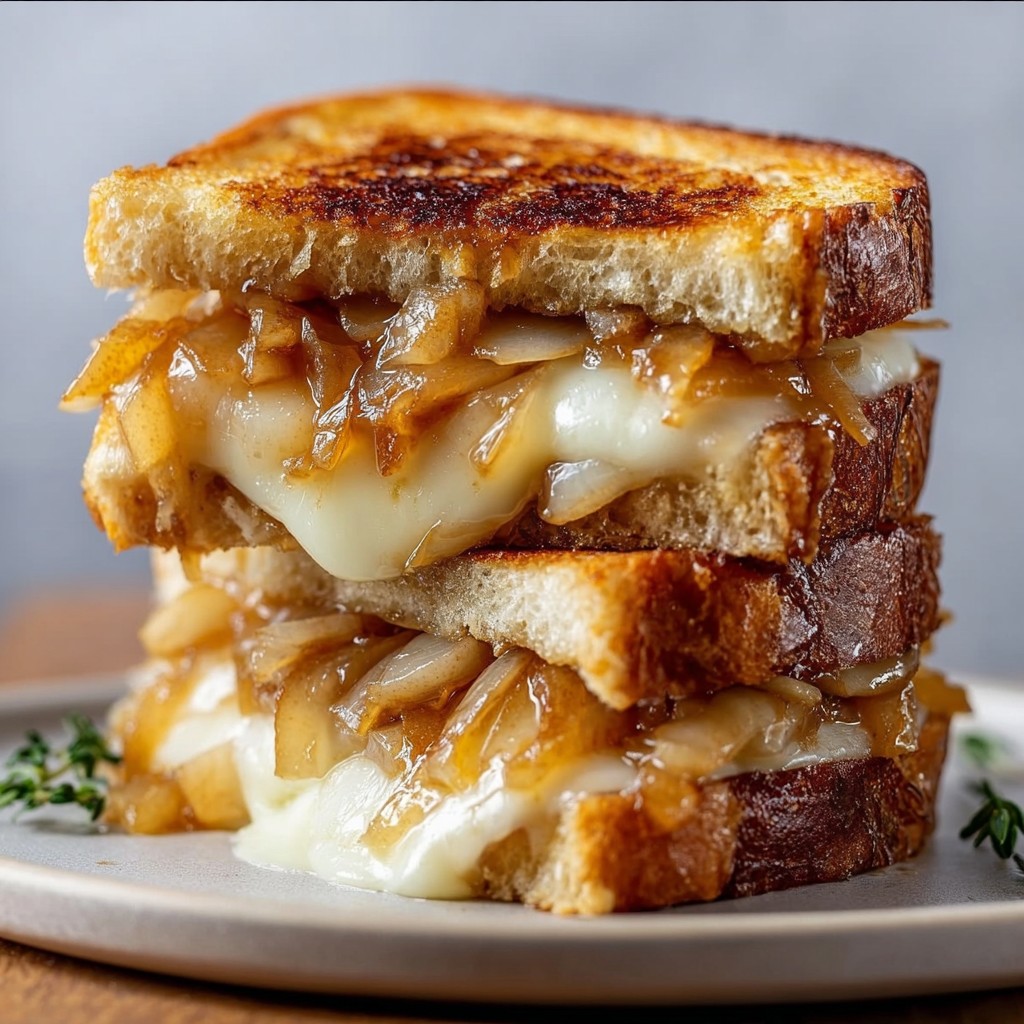
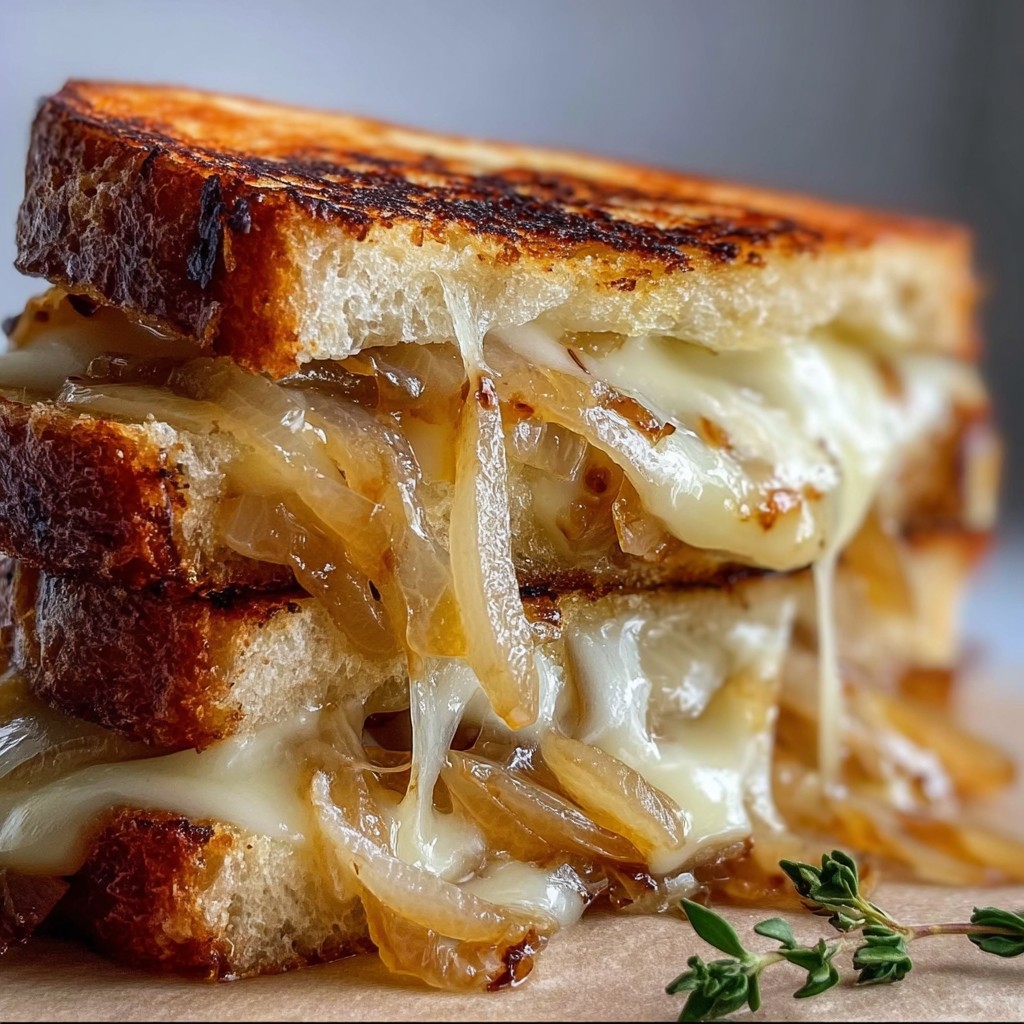
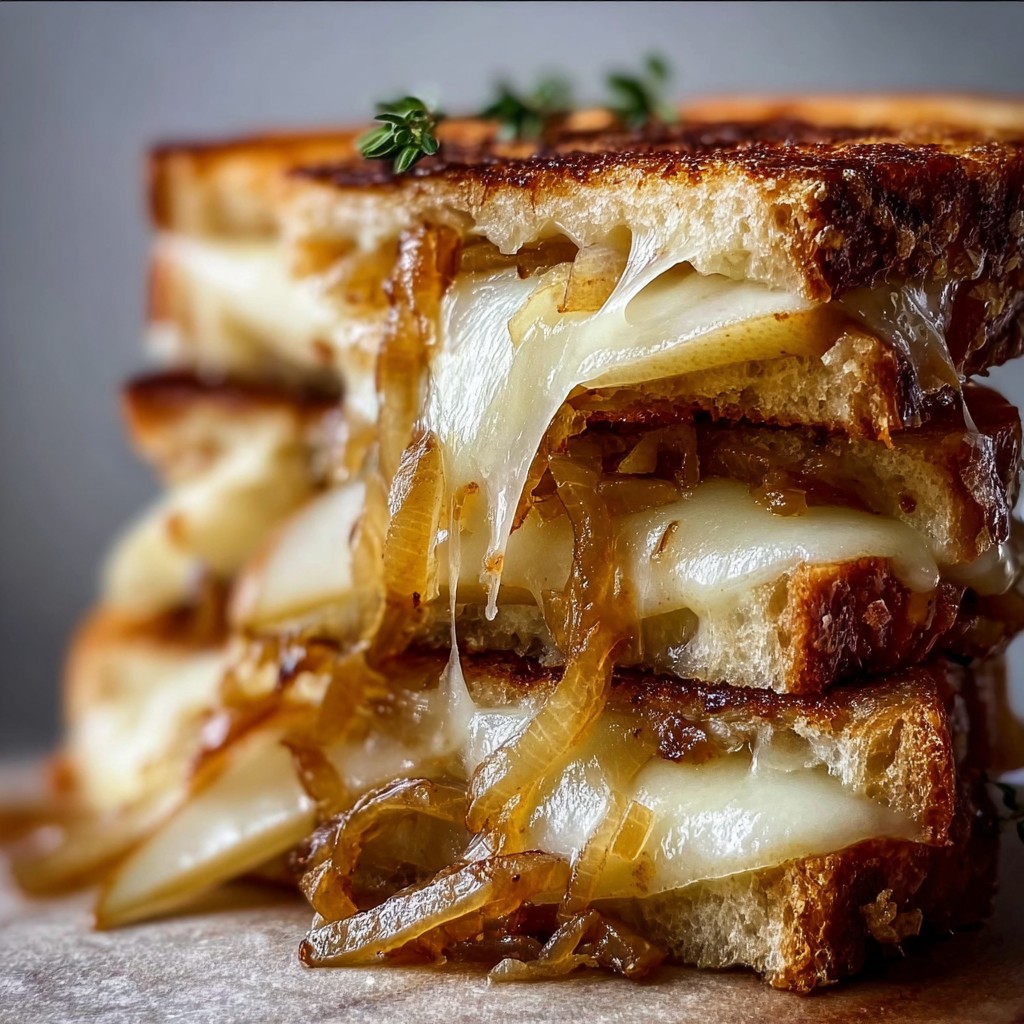
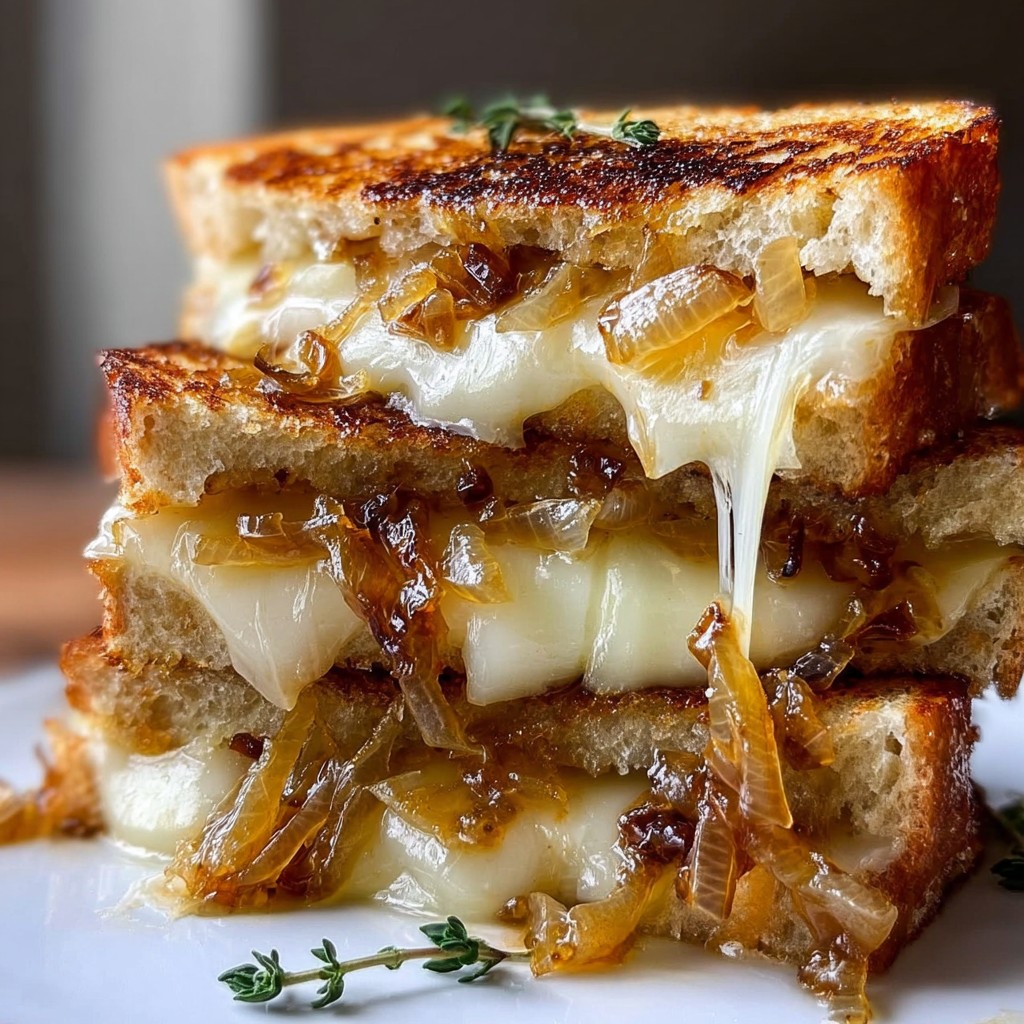
Pear & Apple Grilled Cheese with Caramelized Onions
So, why am I obsessed with this grilled cheese?
You know how sometimes lunch just… needs to be more than a sandwich, but you absolutely don’t want to be faffing about for ages? Yep, that was me on a chilly Tuesday when I first tried tossing fruit into my grilled cheese (I’d forgotten the tomato, classic). The combo of sweet pears, tart apples, gooey cheese and those sticky, jammy onions? I actually called my mum mid-bite to brag. Now honestly, I make this whenever I want to impress myself or, you know, when there’s slightly sad fruit in the fridge. Oh, if you’ve got a good story about ruined grilled cheese, spill — misery loves company, right?
Why You’ll Love This (Or Why I Keep Coming Back To It)
I make this when I can’t look at another bland lunch. My family goes crazy for it because—well, something about the melty cheese and sweet onions means the kitchen always smells amazing. You know what’s funny? The first time I did this, the bread literally slid off the onions and I had cheese everywhere (major mess), but now I layer it just so and it’s all golden and gooey. Also, perfect for using up those slightly wrinkly pears—nobody can tell once they’re grilled. Sometimes I can’t even wait till they cool (I always burn my tongue, every single time). If you’re one of those types that likes a bit of sweet with your savory… this’ll hit the spot, promise.
Let’s Talk Ingredients
- 2 slices sturdy bread (I usually grab sourdough, but any thick bread works—even regular sliced bread in a pinch, though it does go a bit soggy. My nan swears by seeded!)
- 1/2 ripe pear, thinly sliced (Don’t stress about the variety; whatever’s on sale or about to turn works fine.)
- 1/2 crisp apple, thinly sliced (Granny Smith gives a nice tang, but Pink Lady is delish.)
- 1/2 small onion, sliced (White or yellow, both do the job. Red onions turn pink and look a bit wild, FYI.)
- 1 tablespoon butter (Salted for me. If you use margarine, it’ll work, but it’s not quite the same.)
- Handful of grated cheese—anything melty. Cheddar’s my standby, but Gruyère or mozzarella if you’re feeling fancy
- Pinch of salt, splash of olive oil
- Optional: Little drizzle of honey, sprig of fresh thyme, or a dusting of black pepper (I sometimes go for mustard on the inside, just a smidge!)

What’s the Plan? Here’s How It Goes Down…
- Get those onions sorted. Melt half the butter with a splash of olive oil in a small pan on medium-low. Chuck in your onions and a pinch of salt. Stir, and let ‘em go slowly—at least 10–15 minutes. They’ll look pale and weird first, but keep the faith. Stir every so often; if they brown too fast, turn the heat down. This is where I usually check my phone (not always a good idea if you forget about the onions, ha).
- Fruit time. While onions are getting jammy, slice up the pear and apple—pretty thin, like paper, but I never measure. You want enough to cover your bread, but not so much it falls out the sides. If you nick a piece, that’s the chef’s privilege.
- Cheese prep: Grate your cheese (unless you’ve got slices; I’ve used those plasticky singles when desperate and honestly, still tastes good).
- Build it! Lay out the bread. If you’re a mustard fan, swipe a thin layer on the inside. Pile on half the cheese, then arrange the pear and apple in a slightly overlapping (messy is fine) layer. Tip on your caramelized onions (I always sneak a forkful), then the rest of the cheese. Top it with the second slice of bread.
- Grill magic: Melt remaining butter in the pan (medium heat), place the sandwich in, and don’t rush this. Press down a bit with a spatula. It goes 3-5 mins a side—until golden and the cheese oozes. (If it smells toasty, but not burned, you’re winning.) Flip gently!
- Let it rest for a minute or two before cutting. I almost always cut it too early and regret it as cheese escapes everywhere, but patience, eh?
A Few Notes From My Many, Many Attempts
- If you can’t be fussed with onions one day, skip ‘em, but… it really does lose something.
- I’ve tried making this in a sandwich press; it works, but the results are, weirdly, not quite as “edge-of-crispy.”
- Bread that’s too thick = burnt outside, gooey inside. So, I go for that “just right” sourdough thickness—Goldilocks level.
Variations I’ve Messed About With
- Used brie instead of cheddar (very posh, heats super fast, watch it doesn’t ooze all over your stove).
- Tried adding a handful of arugula after grilling—actually really tasty.
- Once added fig jam. Success! But, uh… tried blue cheese once—way too funky for my taste. Maybe you’ll like it.
Don’t Have the Right Gear?
I use an old nonstick frying pan that’s probably seen better days. But to be truthful, you can do this on a sandwich press, or even just a regular skillet. No spatula? Flip it with a fork (carefully). Once used a fish slice—didn’t work, everything fell apart, so maybe avoid that.
Storing Leftovers (If Any…)
Honestly, these don’t usually make it past the afternoon in my house! But on the rare occasion, wrap leftovers in foil and pop in the fridge up to a day. Reheat in a pan for best results although, cold is good too if you like that. I did find that microwaving turns it a bit chewy—not recommended.
How We Like To Serve It
Straight up, always with a hot mug of soup (tomato or pumpkin if it’s raining out). My brother dips his in ketchup, which I still can’t decide if it’s genius or criminal. On days I want to go full comfort mode, tomato soup is my pick. Actually, once made a batch for brunch with strong English breakfast tea—would do again.
Lessons (Sometimes Painful Ones)
- I once tried rushing the onions; ended up with basically fried onions, not caramelized. Don’t make my mistake—let them go low and slow!
- Slicing fruit too thick? Sandwich doesn’t cook through and you get bits falling out everywhere. Actually, finer slices do make a difference here…
Grilled Cheese FAQ (You Ever Wondered?)
- What’s the best cheese to use? Honestly, whatever melts and you like the taste of. Cheddar for classic, Gruyère for grown-ups, and vegan slices work fine (if you must).
- Can I make this ahead? Sure, assemble and wrap, but grill just before eating for max gooeyness.
- Does the fruit make it soggy? Not if you don’t overdo it! Just enough for a layer. You can pat dry with a bit of kitchen towel if you want.
- What other stuff could I add? Try spinach, ham, or leftover roasted veg. I found this list from Serious Eats pretty inspiring when I was in a rut.
- I don’t love onions—skip them? Of course! Just add a little honey or chutney for the missing sweetness.
- Do you really eat it with soup every time? Not always, but it does make me feel a bit smug when I do—like I’ve got my act together.
On a different note, if you ever want to level up your sandwiches, check out Smitten Kitchen’s crispy cheese techniques (some wild stuff there). Anyway, here’s hoping your grilled cheese is as satisfying as a cuppa after a long ramble, and don’t be shy about improvising—half my best recipes start as kitchen experiments gone (mostly) right!
Ingredients
- 8 slices sourdough bread
- 2 tbsp unsalted butter, softened
- 1 medium pear, thinly sliced
- 1 medium apple, thinly sliced
- 1 medium yellow onion, thinly sliced
- 1 cup shredded sharp cheddar cheese
- 1/2 cup sliced brie cheese
- 1 tbsp olive oil
- 1/4 tsp salt
- 1/8 tsp ground black pepper
Instructions
-
1Heat olive oil in a skillet over medium heat. Add the sliced onions and cook, stirring occasionally, until caramelized and golden brown, about 15-18 minutes. Season with salt and pepper.
-
2Butter one side of each slice of bread. Place 4 slices, butter-side down, on a clean work surface.
-
3Evenly layer cheddar cheese, brie, caramelized onions, pear slices, and apple slices on the bread slices. Top with remaining bread, buttered side up.
-
4Heat a large skillet or griddle over medium heat. Cook the sandwiches for 3-4 minutes per side, pressing gently, until golden brown and the cheese is melted.
-
5Remove from heat, slice, and serve warm.
Approximate Information for One Serving
Nutrition Disclaimers
Number of total servings shown is approximate. Actual number of servings will depend on your preferred portion sizes.
Nutritional values shown are general guidelines and reflect information for 1 serving using the ingredients listed, not including any optional ingredients. Actual macros may vary slightly depending on specific brands and types of ingredients used.
To determine the weight of one serving, prepare the recipe as instructed. Weigh the finished recipe, then divide the weight of the finished recipe (not including the weight of the container the food is in) by the desired number of servings. Result will be the weight of one serving.
Did you make this recipe?
Please consider Pinning it!!