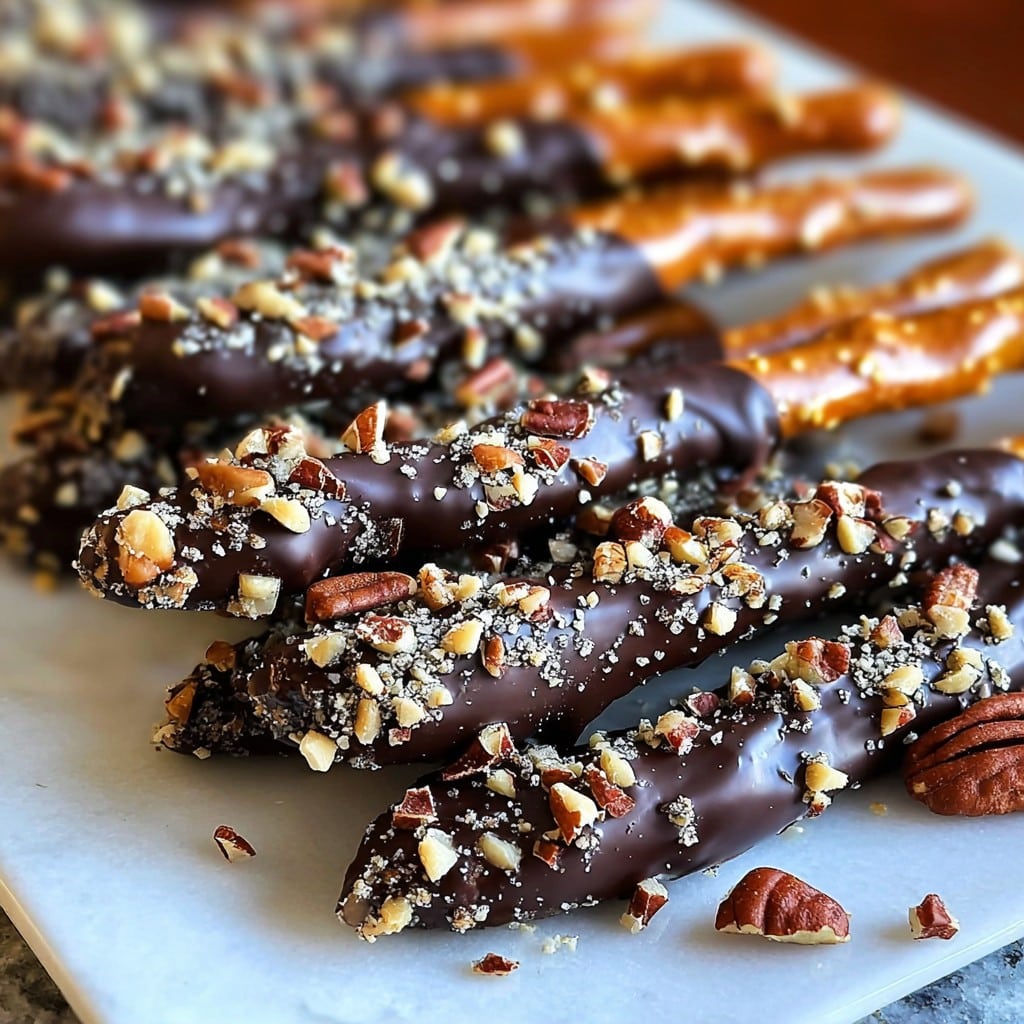
Turtle Pretzel Rods
If You Need a Smile, Make Turtle Pretzel Rods
Let me just say this: there’s something about chocolate + caramel + salty crunch that fixes pretty much any bad day. I got into making Turtle Pretzel Rods one summer when my niece insisted we make something she saw on, I want to say, Pinterest? Anyway, we made a mess, ate a ridiculous amount of chocolate off the spoon, and immediately decided this had to be a new family tradition. And if you’re picturing caramel streaks all over my kitchen counter, you’re not wrong. My sister still brings it up (with a long sigh).
Why You’ll Love This Snack (Even if You Don’t Think You Will)
I make these Turtle Pretzel Rods whenever I need a last-minute treat or have too many half-used bags of baking chips kicking around. My family goes completely bonkers for them—probably because it’s basically a candy bar on a stick, which, let’s be real, is way more fun to eat. (I once tried to make these after work in a hurry and the caramel ended up everywhere. Lesson learned: don’t rush caramel!)
Here’s What You’ll Need (with Some Wiggle Room)
- 12 large pretzel rods (I’ve used the gluten free ones, and they work fine—unless you’re a salt fiend)
- 1 cup soft caramel candies, unwrapped (Werther’s or Kraft, but honestly store brand is fine)
- 2 tablespoons heavy cream (in a pinch, I’ve just used milk—but the caramel ends up a little harder)
- 1 ⅓ cups semisweet chocolate chips (or milk chocolate, or frankly whatever is in the cupboard)
- ⅓ cup chopped pecans (but walnuts work, or skip nuts altogether if you like)
- Coarse sea salt, just a pinch (but regular table salt will do in a jam)
- Optional: ½ cup white chocolate chips for drizzling (not traditional but my neighbor swears by it)
Let’s Make ‘Em: Directions from One Busy Cook to Another
- Grab a baking sheet and line it with parchment (or foil—I’ve used even wax paper but that’s risky if your kitchen is hot).
- Put those caramel candies and heavy cream in a microwave safe bowl. Nuke for 30 seconds, stir, then another 15 seconds if needed til it’s smooth-ish. I usually sneak a taste right about now. If it looks a bit lumpy, just stir longer; that’s normal.
- Dip each pretzel rod into the melty caramel, using a spoon to help cover about 2/3 of the rod. Let the excess drip back. This is sticky business but you get used to it.
- Lay each caramel-dipped pretzel on the parchment. If the caramel pools—don’t fret. It happens. Pop the tray in the fridge for 10 minutes so it firms up just a little.
- Meanwhile, melt your chocolate chips in another bowl. You can use the microwave (30 second bursts, stir each time), but I’ve also balanced a heat-proof bowl over a kettle once when the microwave was occupied. Kind of a hack—watch for burns!
- Coat the caramel-dipped ends of the pretzels in melted chocolate. Use a butter knife or spatula if you like to really slather it on. Jiggle off any extra chocolate before laying them back on the tray.
- Before the chocolate sets, sprinkle the chopped pecans over the top, and add a little pinch of sea salt (don’t get carried away—a little goes a long way. Ask me how I know).
- If you’re feeling fancy, melt the white chocolate and drizzle it over the top. You only live once, right?
- Back in the fridge with the tray for at least 20 minutes—just let everything set up. This is the hardest part for impatient snackers.
- Peel ‘em off the paper and… that’s it. You did it! Try to wait for the chocolate to finish hardening, but honestly they’re good a bit melty too.

A Few Notes From the School of Hard Knocks
- Don’t try to use too much caramel, or it’ll ooze into a puddle. (Been there, cleaned that.)
- If your kitchen is really warm, put the tray in the freezer for a few minutes between steps. Otherwise, expect chocolate handprints on your fridge handle.
- I once used mini pretzel rods. Did not work. Too short to get good coverage or hold all the good stuff.
Variations I’ve Tried (And One That Flopped)
- Milk chocolate instead of semisweet—my kids call it “cheat day” version.
- Almonds instead of pecans. Pretty nice, but not quite “turtle-y.”
- Skittles instead of nuts. Looked wild! Tasted…well, it was a hit with exactly one 8-year-old at the table.
- Extra sea salt on top—I did this once. Regretted it. One pinch is plenty.

Do You Need Fancy Tools? (Only Kind Of)
You’ll want a microwave, but if you don’t have one, a little saucepan over low heat works—just stir constantly. I do use a baking sheet with parchment, but if you’re out of that, an old cutting board and some plastic wrap will muddle through.
How to Keep (If They Last That Long…)
Store Turtle Pretzel Rods in an airtight container in the fridge. They’ll stay good for a week or so, but honestly, in my house they never last more than a day! If you want to make ahead, just don’t add the salt til serving—it soaks in.

How We Serve These (Or: Snack Time Traditions)
I like to bundle a few rods with ribbon and give as quick gifts. At home, we pile ‘em in a mason jar and pretend it’s “party food.” Once I broke them into pieces and sprinkled over ice cream, and wow, that was genius (if a bit over-the-top).
Things I’ve Learned the Hard Way (So You Don’t Have To)
- Don’t rush the cooling steps—if you do, everything slides off and sticks to your hands. (Yup, been there twice, not proud.)
- Heavy caramel = droopy pretzels.
- Oh, and don’t try to stack them before chilled or you’ll end up with one giant turtle mess.
FAQ—Because People Always Ask
- Can I make these nut free?
Yes! Just skip the nuts—or use crushed pretzels or mini M&Ms if you want crunch. My friend Carol does sunflower seeds, but honestly that’s just not my jam. - How do I stop the caramel from sliding off?
Let the caramel layer set (fridge or freezer). If you dip in chocolate too soon, it’s a slip-n-slide. - Room-temp or fridge?
I keep ‘em in the fridge for snap. If it’s cool out, honestly you can leave them on the counter and they’ll be fine for a couple hours. - Do I have to use white chocolate?
Nope! It’s just for show. Skip it or swap for dark. Or just eat straight up. - Can I double the batch?
Yes—just make sure you have enough fridge space! (I once crowded everything and half my batch ended up stuck together, which was tragic. Well, sort of.)
And that’s the snack! Turtle Pretzel Rods are dead simple, totally customizable, and just a bit messy (the good kind). Enjoy every goofy bite—just don’t blame me if your kitchen looks like a chocolate tornado blew through!
Ingredients
- 12 large pretzel rods
- 1 cup soft caramel candies, unwrapped
- 2 tablespoons heavy cream
- 1 ⅓ cups semisweet chocolate chips
- ⅓ cup chopped pecans
- Coarse sea salt, just a pinch
- Optional: ½ cup white chocolate chips for drizzling
Instructions
-
1Grab a baking sheet and line it with parchment (or foil—I’ve used even wax paper but that’s risky if your kitchen is hot).
-
2Put those caramel candies and heavy cream in a microwave safe bowl. Nuke for 30 seconds, stir, then another 15 seconds if needed til it’s smooth-ish. I usually sneak a taste right about now. If it looks a bit lumpy, just stir longer; that’s normal.
-
3Dip each pretzel rod into the melty caramel, using a spoon to help cover about 2/3 of the rod. Let the excess drip back. This is sticky business but you get used to it.
-
4Lay each caramel-dipped pretzel on the parchment. If the caramel pools—don’t fret. It happens. Pop the tray in the fridge for 10 minutes so it firms up just a little.
-
5Meanwhile, melt your chocolate chips in another bowl. You can use the microwave (30 second bursts, stir each time), but I’ve also balanced a heat-proof bowl over a kettle once when the microwave was occupied. Kind of a hack—watch for burns!
-
6Coat the caramel-dipped ends of the pretzels in melted chocolate. Use a butter knife or spatula if you like to really slather it on. Jiggle off any extra chocolate before laying them back on the tray.
-
7Before the chocolate sets, sprinkle the chopped pecans over the top, and add a little pinch of sea salt (don’t get carried away—a little goes a long way. Ask me how I know).
-
8If you’re feeling fancy, melt the white chocolate and drizzle it over the top. You only live once, right?
-
9Back in the fridge with the tray for at least 20 minutes—just let everything set up. This is the hardest part for impatient snackers.
-
10Peel ‘em off the paper and… that’s it. You did it! Try to wait for the chocolate to finish hardening, but honestly they’re good a bit melty too.
Approximate Information for One Serving
Nutrition Disclaimers
Number of total servings shown is approximate. Actual number of servings will depend on your preferred portion sizes.
Nutritional values shown are general guidelines and reflect information for 1 serving using the ingredients listed, not including any optional ingredients. Actual macros may vary slightly depending on specific brands and types of ingredients used.
To determine the weight of one serving, prepare the recipe as instructed. Weigh the finished recipe, then divide the weight of the finished recipe (not including the weight of the container the food is in) by the desired number of servings. Result will be the weight of one serving.
Did you make this recipe?
Please consider Pinning it!